iOS设备越狱
工具:PP助手、TaiG、evasi0n (http://evasi0n.com)
设备:iPhone6,iOS8.3
由于我使用了PP助手对手机设备进行越狱操作的,没有什么技术性,这里就暂时略过,以后再研究下使用TaiG、evasi0n等工具进行越狱再补上。
查看越狱iOS设备APP文件夹
工具:PP助手、iTools、iFunBox
iOS8.3之后由于苹果加强了沙盒的安全性,导致工具无法直接查看到APP的沙盒文件夹结构,所以要查看iOS设备沙盒文件就需要进行越狱之后使用文件管理工具查看。
文件查看工具查看越狱后的iOS设备文件夹结构如下: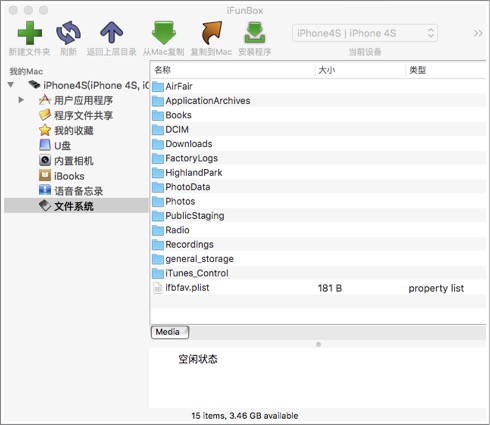
如果想要查看APP沙盒文件夹结构,需要将iPhone越狱后再安装AFC2。
步骤如下:
1、打开Cydia
2、打开“搜索”Tab项
3、输入“Apple File Conduit ‘2’”
4、安装“Apple File Conduit ‘2’”
此时可通过文件查看工具查看APP沙盒文件夹结构如下: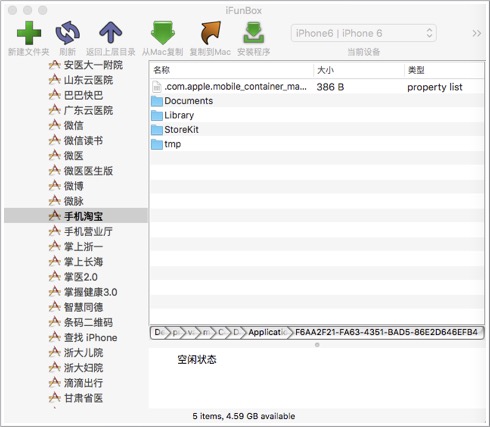
远程连接iOS设备
工具:Terminal.app
1、手机中打开Cydia,打开“搜索”Tab项,输入“OpenSSH’”,安装“OpenSSH”
2、确保手机已经连接了WIFI并且你的手机的WIFI
和你的电脑要在同一个局域网内,打开终端输入:
ssh root@xx.xx.xx.xx,(xx.xx.xx.xx)为你的手机的IP地址—>Enter
3、接着会提示你输入password:
这里的密码一般情况下是alpine,但是如果你更改过的话就用你更改的[这里的密码是手机openssh的密码,不是电脑密码也不是手机解锁密码]
4、然后来输入吧,通过cd可以进入到制定的文件夹目录
iPhone6:~ root# cd /usr/bin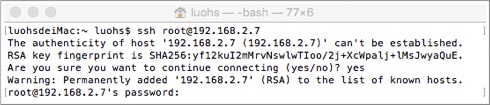
APP砸壳
工具:Clutch、Terminal.app、iFunBox
Clutch源码:(https://github.com/KJCracks/Clutch/releases)
1、将Clutch拷贝到手机设备中:/usr/bin/
方式1:iFunBox直接拷贝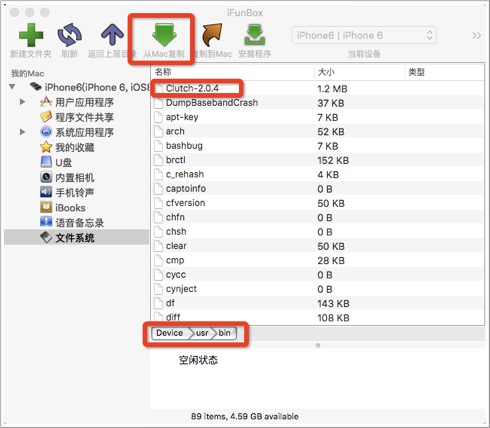
方式2:scp /path/to/Clutch root@
2、解决运行Clutch时报Permission denied的错误
运行Clutch时报错如下: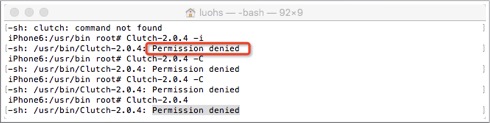
解决方法如下:
从上图可以看出错误的类型,Permission denied就指权限受限,只要赋予其权限即可。
1、打开Terminal.app
2、终端里输入chmod a+x Clutch,如下图所示:
3、Clutch使用方法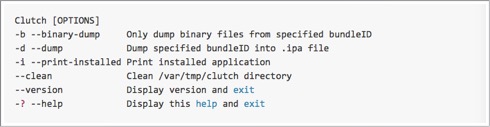
4、查看iOS设备中所有所安装的APP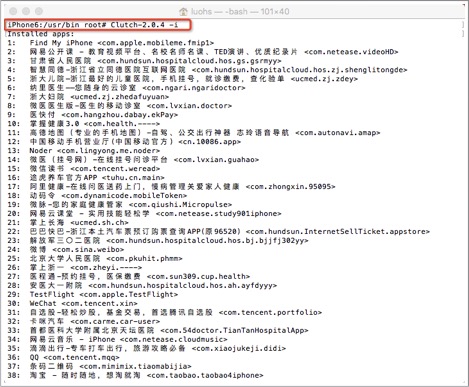
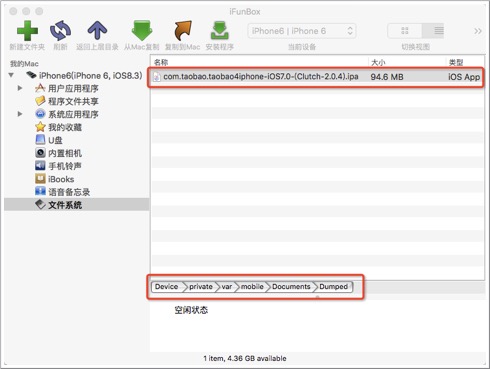
5、通过Clutch命令砸壳,如图所示: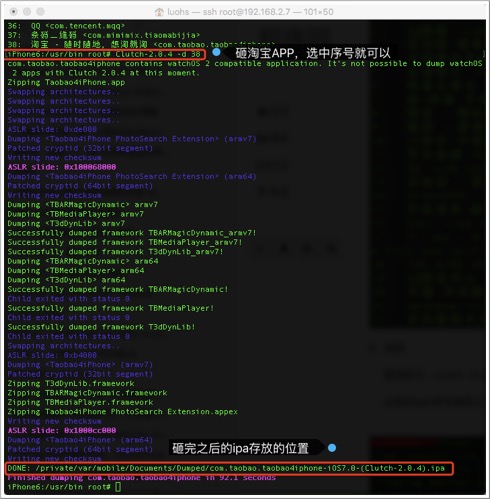
参考:
http://iphonedevwiki.net/index.php/Reverse_Engineering_Tools